
N Gauge Locomotive Kits: A Guide for Railway Modellers
N gauge locomotive kits offer a rewarding way to add character to a model railway. They let you build engines that may be difficult to find ready-made, recreate a particular prototype or enjoy the satisfaction of making a locomotive from its component parts. From straightforward body kits to finely detailed brass models, there are options for a range of budgets and abilities.
What is N gauge?
N gauge describes model railway track with a gauge of 9 mm. In the UK, models are generally built to a scale of 1:148, while many models made for other markets use 1:160. The difference matters when choosing a kit or comparing it with rolling stock and buildings, so check the manufacturer’s stated scale before buying.
Types of locomotive kit
Kits vary considerably in their materials and how much work they require. Common types include:
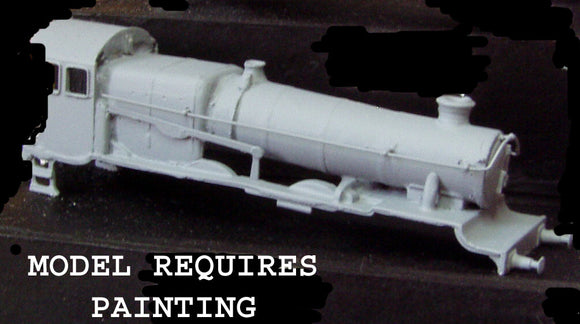
- Resin and 3D-printed kits: Often supplied as a locomotive body or a set of body parts. They can include unusual prototypes and fine surface detail, but may need careful cleaning, filling and painting.
- Etched-brass kits: These use thin sheets of brass with parts etched into them. The pieces are folded and assembled, usually by soldering. They can produce crisp, delicate models, but demand patience and good hand-eye co-ordination.
- Whitemetal kits: Made from cast metal parts, these may provide a pleasing weight and traditional modelling experience. Parts can require filing and careful fitting, and some designs need a separate powered chassis.
- Plastic kits: These are assembled using plastic cement and may be a good introduction to kit building. Availability and complexity vary, particularly for less common prototypes.
Some kits are complete models, while others supply only the body. A separate chassis, wheels, motor, gears or pick-ups may be needed. Read the listing and instructions closely so you know exactly what is included.
Choosing a kit
Start by deciding what you want from the finished locomotive. A kit can be chosen to represent a particular railway, period or class, or simply to provide a distinctive engine for a layout. Before ordering, check:
- Compatibility: Confirm the recommended chassis and whether it suits your track, curves and operating needs.
- Skill level: Look for photographs of the parts and completed model, along with information about soldering, drilling or other specialist work.
- Completeness: Check whether transfers, glazing, handrails, wheels and other fittings are supplied.
- Dimensions and scale: Verify the model’s scale and overall length, especially if it will run alongside models from different markets.
- Availability of instructions and spares: Clear instructions and access to replacement parts can make a substantial difference during the build.
Tools and materials
The tools needed depend on the kit, but a basic workbench may include a craft knife, fine files, tweezers, small pliers, a cutting mat and suitable adhesive. Brass kits may also require a temperature-controlled soldering iron, solder and flux. For painting, use products suitable for the kit’s material and work in a well-ventilated area. Always follow the manufacturer’s safety guidance, particularly when cutting, sanding or soldering.
Building and painting
Take time to study the instructions before removing parts from their sprues or frets. Dry-fit components where possible, and work in stages rather than trying to complete the model in one sitting. Small parts are easy to lose, so a shallow tray or compartmented box can help keep them organised.
Before painting, remove mould-release residue, fingerprints and dust using a method appropriate to the material. A suitable primer helps paint adhere and can reveal gaps or rough areas that need attention. Apply thin coats, allowing each one to dry properly. Transfers and weathering can then bring the model closer to the appearance of a working locomotive, whether clean and well-kept or marked by years of service.
Fitting a powered chassis
Turning a body kit into a working locomotive can be one of the most demanding parts of the project. The chassis must fit the body and match the wheel arrangement, while the motor and gears need to run smoothly without fouling the bodywork. Check the instructions for a recommended chassis, and test-run the mechanism before final assembly and painting where practical.
Good electrical pick-up and smooth running are just as important as appearance. Keep wheels clean, check that the chassis is correctly assembled and test the locomotive at low speed before putting it into regular service. If the kit is intended as a static model, do not assume it can be made powered without modifications.
A satisfying addition to a layout
N gauge locomotive kits can be more challenging than buying a ready-to-run model, but they offer scope for individuality and craftsmanship. With careful research, the right tools and a patient approach, a kit can become a distinctive centrepiece for a compact layout—or a welcome addition to a collection of less commonly modelled engines.
Essential FAQs for Building N Gauge Locomotive Kits: A Comprehensive Guide
- What is included in an N gauge locomotive kit?
- Do N gauge locomotive kits come with a motor and chassis?
- Are N gauge locomotive kits suitable for beginners?
- What tools and materials do I need to build an N gauge locomotive kit?
- How do I choose a compatible chassis for an N gauge locomotive kit?
- How do I paint and detail an N gauge locomotive kit?
What is included in an N gauge locomotive kit?
What’s included in an N gauge locomotive kit depends on the manufacturer and kit type. Some contain the locomotive body and detail parts only, while others include a chassis, wheels, motor and gears. Transfers, glazing and small fittings may be supplied, but paint and adhesives are often sold separately. Check the product description carefully to see whether you’ll need to buy a compatible powered chassis or other components to complete the model.
Do N gauge locomotive kits come with a motor and chassis?
Not always. Some N gauge locomotive kits are supplied as complete, powered models, but many include only the body and detail parts, with the motor and chassis sold separately. Check the product description and instructions before buying, and make sure any recommended chassis is compatible with the kit and your layout.
Are N gauge locomotive kits suitable for beginners?
Yes, some N gauge locomotive kits are suitable for beginners, particularly simple plastic or resin body kits with clear instructions and few parts. However, N gauge components are small, so careful handling and basic modelling skills are helpful. Check whether the kit includes a chassis or requires separate parts, and choose one labelled as beginner-friendly. Starting with a straightforward kit and taking your time can make the experience enjoyable and help build confidence.
What tools and materials do I need to build an N gauge locomotive kit?
To build an N gauge locomotive kit, you’ll typically need a sharp craft knife, fine files, tweezers, small pliers and a cutting mat, plus an adhesive suited to the kit’s material. Brass kits may also require a soldering iron, solder and flux, while painting usually calls for primer, model paints and fine brushes or an airbrush. Depending on the kit, you may need additional parts such as a compatible chassis, motor, wheels or detailing components, so check the instructions and contents before you begin. Work in a well-ventilated area and follow safety guidance when cutting, sanding or soldering.
How do I choose a compatible chassis for an N gauge locomotive kit?
To choose a compatible chassis for an N gauge locomotive kit, first check the kit instructions or manufacturer’s notes for a recommended chassis, as the wheel arrangement, wheelbase and overall dimensions must match the prototype and body. Confirm whether the kit is designed for a particular make or model, and check that the motor, gears and pickups will fit without fouling the body. If no chassis is specified, compare measurements carefully and seek advice from the kit supplier or an experienced N gauge modeller before buying. Keep in mind that N gauge models may use different scales, so check the stated scale as well as the 9 mm track gauge.
How do I paint and detail an N gauge locomotive kit?
Clean and gently prepare the kit according to its material, then apply a suitable primer to help paint adhere and reveal any imperfections. Use fine brushes or an airbrush to build up thin coats, allowing each layer to dry fully; mask areas where you want a sharp colour boundary. Add small details such as handrails, lamps and glazing with fine tools, then apply transfers to a smooth surface and seal them with a suitable varnish. Finish with restrained weathering if appropriate to the locomotive’s era and condition, and work with good ventilation while following the paint and adhesive manufacturers’ safety instructions.