
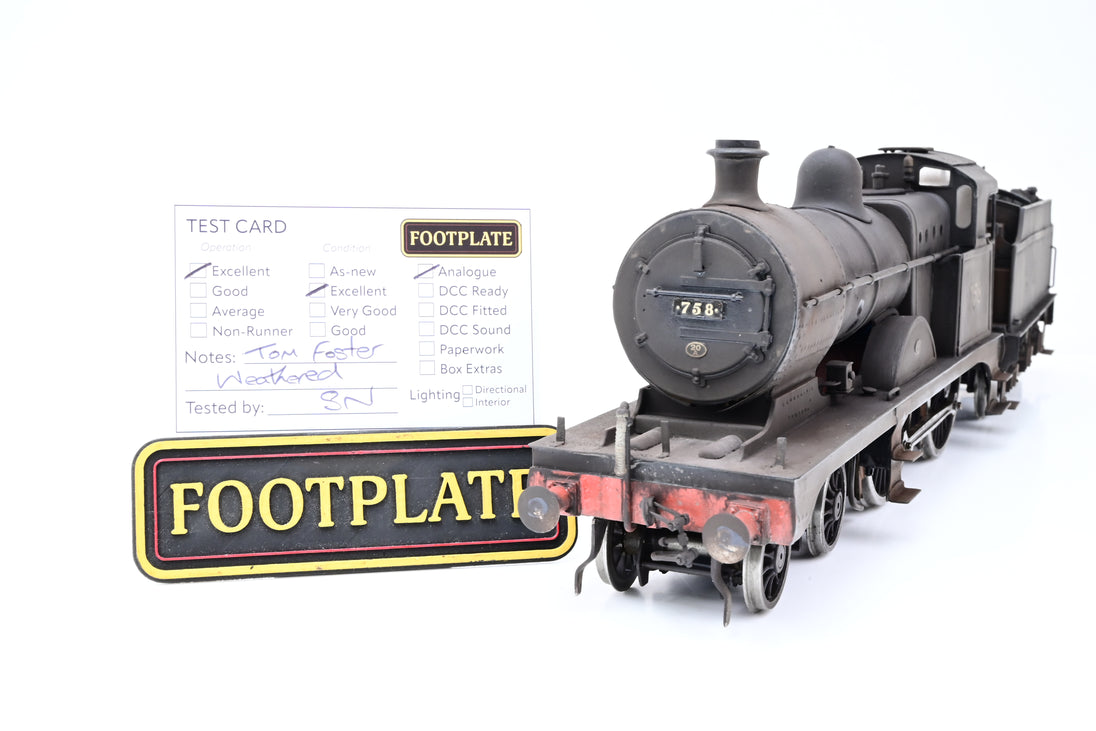
0 Gauge Locomotive Kits: A Guide for Model Railway Enthusiasts
Building a locomotive from a kit is one of the most rewarding ways to add a personal touch to an 0 gauge model railway. Whether you are drawn to the character of a steam engine or the clean lines of a diesel, a kit gives you the chance to assemble, finish and, in many cases, customise a model yourself.
What is 0 gauge?
0 gauge describes a model railway track gauge rather than a single, universally agreed scale. In the UK, 0 gauge commonly uses 32 mm track and a scale of 7 mm to the foot, or approximately 1:43.5. Other countries and manufacturers may use different scales and track standards, so check the specifications before buying a kit, particularly if you plan to run it alongside existing models.
Types of locomotive kit
Locomotive kits vary considerably in material, complexity and how much work they require. Common options include:
- Plastic kits: Often supplied as moulded parts, these can be a good introduction to kit building. They may need additional detailing, painting and, depending on the design, a separate motor and chassis.
- Metal kits: Brass, nickel silver and white metal kits can offer fine detail and a satisfying weight. Some require soldering, careful fitting and specialist tools.
- Etched-metal kits: These use thin metal sheets with parts cut or etched into them. Parts are folded and assembled, usually by soldering or using an appropriate adhesive.
- Ready-to-run conversion kits: These are designed to modify or enhance an existing model, rather than build a complete locomotive from scratch.
Some kits provide only the body, while others include a chassis, wheels, motor and gears. Read the contents list closely: extra parts can add to both the cost and the time needed to finish the model.
Choosing the right kit
Start with your experience, available tools and the kind of model you want to run. A simple kit with clear instructions is usually a sensible first project. More advanced kits may involve precise chassis assembly, soldering, mechanical adjustments or extensive painting and lining.
It is also worth checking:
- whether the model is compatible with your track and curves;
- whether a motor and transmission are included;
- the recommended minimum curve radius;
- the quality and clarity of the instructions;
- the availability of replacement parts and building advice; and
- whether the finished locomotive will suit your layout’s era and location.
Building a locomotive kit
Good preparation makes a big difference. Before assembly, lay out the components and compare them with the instructions. Check that the parts are present, identify any that need cleaning up, and make sure you have the correct tools and adhesives. Depending on the kit, you may need fine files, tweezers, small drills, a soldering iron, modelling knives and clamps.
Work steadily and test-fit parts before fixing them in place. Chassis alignment is especially important: wheels and gears need to turn freely, and the locomotive should sit squarely on the track. If the kit includes a motor, test the mechanism at low speed before fitting delicate body details. Taking photographs during each stage can also help if you need to retrace your steps.
Painting and finishing
Once the model is assembled, careful preparation helps create a neat finish. Remove dust and residue, apply a suitable primer and use paints compatible with the kit’s material. Thin coats generally preserve fine detail better than one heavy coat. Allow each layer to dry fully before adding further colours, transfers or lining.
Weathering can bring a model to life, but it is best applied gradually. A light coating of dust, soot or road grime may be more convincing than an extensive finish, particularly on a locomotive intended to represent a well-maintained engine. Always follow the product instructions and work with suitable ventilation when using paints, solvents or sprays.
A rewarding project
An 0 gauge locomotive kit can be a substantial project, but it offers more than a finished model. Building one develops practical skills and gives you a closer understanding of how a locomotive is put together. For beginners, starting with a straightforward kit and seeking advice from a model railway club can make the process much easier. For experienced builders, a detailed kit offers scope for careful customisation and a locomotive that feels truly individual.
8 Essential Tips for Building 0 Gauge Locomotive Kits
- Check the kit’s scale and gauge before buying.
- Read the instructions fully before assembly.
- Sort and label small parts first.
- Use the recommended adhesive for each material.
- Clean flash and burrs with care.
- Test-fit parts before gluing them.
- Keep wheelsets square and free-running.
- Paint and weather in thin, even layers.
Check the kit’s scale and gauge before buying.
Before buying an 0 gauge locomotive kit, check both its scale and track gauge, as the terms are not interchangeable. Kits may be made to different scales or standards, even when described as 0 gauge, so confirm that the model will match your existing track, rolling stock and layout. This simple check can help avoid compatibility problems and ensure the finished locomotive looks right alongside your other models.
Read the instructions fully before assembly.
Before assembling an 0 gauge locomotive kit, read the instructions all the way through. This helps you understand the order of the build, identify any tools or extra parts you’ll need, and spot stages that require particular care. A little preparation can prevent avoidable mistakes and make the whole project more enjoyable.
Sort and label small parts first.
Before you begin assembling an 0 gauge locomotive kit, sort the small parts and label them according to the instructions. Keep screws, washers, castings and etched components in separate, clearly marked containers or compartments. This simple step makes parts easier to find, reduces the risk of losing them and helps prevent similar-looking pieces from being mixed up during assembly.
Use the recommended adhesive for each material.
Use the adhesive recommended for each material to make sure parts bond securely without damaging them. Plastic cement, for example, works by softening compatible plastic, while metal components may need solder or a suitable metal adhesive. Check the kit instructions before assembly, and test unfamiliar products on spare material where possible.
Clean flash and burrs with care.
Clean flash and burrs carefully before assembling an 0 gauge locomotive kit. These small remnants of moulding or etching can stop parts fitting neatly and may spoil the finished surface. Use a fine file, sanding stick or suitable modelling tool, removing material a little at a time and checking the fit as you go. Take extra care around delicate details, and wear eye protection when filing or cutting.
Test-fit parts before gluing them.
Before applying glue, test-fit each part to make sure it sits correctly and lines up with the surrounding components. This is especially important for the chassis, body and small details, where even a slight misalignment can affect the locomotive’s appearance or movement. A dry fit also helps reveal any parts that need trimming or adjustment, making assembly neater and reducing the risk of having to undo a permanent join.
Keep wheelsets square and free-running.
When assembling an 0 gauge locomotive kit, make sure the wheelsets sit squarely in the chassis and turn freely without rubbing or binding. Misaligned axles can cause poor running, derailments and unnecessary wear on the gears. Check the wheels from several angles, then roll the chassis along a short length of straight, level track before fitting the body. A little care at this stage can make a noticeable difference to the locomotive’s performance.
Paint and weather in thin, even layers.
For a convincing finish on an 0 gauge locomotive, apply paint and weathering in thin, even layers rather than trying to achieve the effect all at once. Light coats help preserve fine details, reduce the risk of drips and give you greater control over the final appearance. Allow each layer to dry before adding the next, building up colour and weathering gradually until the locomotive looks suitably finished.